e of Contents
- Identifying the Causes of Hard Drive and RAID Array Problems
- Best Practices for Maintaining Hard Drives and RAID Arrays
- Tips for Repairing Hard Drives and RAID Arrays
- Common Solutions for Hard Drive and RAID Array Issues
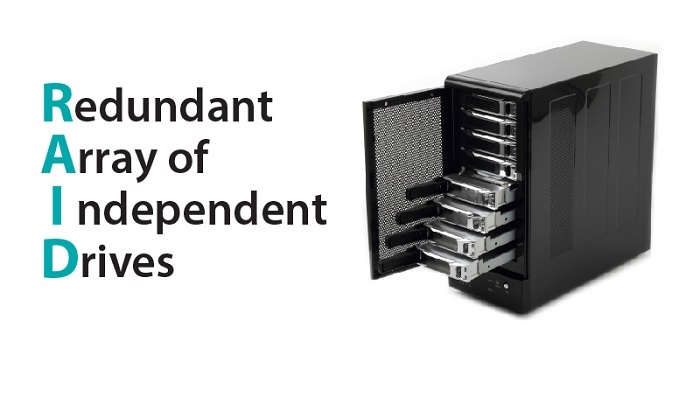
This guide will provide an overview of how to troubleshoot hard drives and RAID arrays. We will discuss the different types of RAID arrays, their advantages and disadvantages, and the tools and techniques used to troubleshoot them. We will also discuss the importance of backing up data and the potential risks associated with RAID array failure. By the end of this guide, you should have a better understanding of the causes and solutions for common hard drive and RAID array issues.
Step-by-Step Guide to Troubleshooting Hard Drives and RAID Arrays
1. Check the Physical Connections
The first step in troubleshooting hard drives and RAID arrays is to check the physical connections. Make sure that all cables and connections are firmly attached to the hard drives and RAID array. If any of the cables are loose or not connected properly, power off the system and reconnect all cables before powering the system on again.
2. Check the Status of the RAID Array
Next, use the RAID controller to check the status of the RAID array. If the RAID array is functioning properly, you should be able to see the hard drives as part of the array. If the array is not functioning properly, you may need to reconfigure the array or replace a failed hard drive.
3. Check the Hard Drive Status
Once you have confirmed that the RAID array is working properly, you can use the RAID controller to check the status of each individual hard drive. If a hard drive has failed, you can replace it with a new one.
4. Check for Bad Sectors
When troubleshooting hard drives and RAID arrays, it is important to check for bad sectors. Bad sectors can cause data loss or corruption. To check for bad sectors, use a disk utility such as CHKDSK or SpinRite to scan the hard drive for errors.
5. Test the Hard Drive
If you have identified bad sectors on the hard drive, you should test the hard drive to ensure that it is still functioning properly. You can use a variety of disk utilities to test the hard drive, such as S.M.A.R.T. or HDTune.
6. Check the Data
The final step in troubleshooting hard drives and RAID arrays is to check the data on the drives. If you have identified bad sectors, you should use a backup or recovery utility to check the integrity of the data on the drives. If the data is corrupted, you may need to restore it from a backup or use data recovery software to restore the lost data.
By following these steps, you can quickly and effectively troubleshoot hard drives and RAID arrays. Always remember to back up your data before attempting any troubleshooting or repair.
Identifying the Causes of Hard Drive and RAID Array Problems
Hard drives and RAID arrays are crucial components for any computer system, and if they fail, the entire system can be rendered inoperable. Therefore, it is important to be aware of the most common causes of hard drive and RAID array problems in order to minimize downtime and ensure that data is not lost. The most common cause of hard drive and RAID array failure is mechanical failure. This can occur due to a variety of reasons, such as excessive vibration, excessive heat, or physical damage. When a hard drive or RAID array experiences mechanical failure, the drive may not be able to spin up, or it may be unable to read or write data. Another common cause of hard drive and RAID array failure is firmware failure.
Firmware is a set of instructions that tell the drive how to operate, and if it is corrupted or outdated, the drive may not be able to read or write data. Additionally, firmware issues can cause the drive to become unresponsive or to misbehave in other ways. The third most common cause of hard drive and RAID array failure is a power surge or other power-related issue. If a power surge occurs, it can cause the drive to become unresponsive, or it can corrupt the data stored on the drive. Additionally, improper power management can cause a drive to become unresponsive or to corrupt data stored on it.
Finally, hard drives and RAID arrays can also experience failure due to physical damage. This can occur due to a number of reasons, such as dropping the drive, exposing it to water or other liquids, or physical manipulation. If physical damage occurs, the drive may not be able to read or write data, or it may be unresponsive. By understanding the common causes of hard drive and RAID array failure, computer system administrators can take steps to prevent these issues from occurring and minimize downtime. Additionally, understanding these causes can help administrators identify and fix any problems in a timely manner, reducing the risk of data loss.
Best Practices for Maintaining Hard Drives and RAID Arrays
1. Regularly back up data: Backup your data to a secure external device on a regular basis. This will ensure that your data is safe and secure in the event of an unexpected hard drive failure.
2. Check for errors: Run a disk check on all of your hard drives and RAID arrays on a regular basis. This will help to identify any potential issues with the drives before they become a major problem.
3. Monitor temperatures: Hard drives and RAID arrays should be kept in an environment that is cool and free of dust. Use temperature monitoring software to ensure that your drives are kept within the manufacturer’s recommended temperature range.
4. Perform regular maintenance: Perform regular maintenance such as defragmentation and disk cleanup to keep your drives running smoothly. Also, regularly check for any updates to the firmware or operating system.
5. Replace drives as needed: If a hard drive or RAID array starts to show signs of failure, replace it immediately. Continuing to use the drive may cause further damage, and result in data loss.
6. Use quality parts: When replacing or repairing a drive, use quality parts that meet or exceed the manufacturer’s specifications. This will ensure that your hard drives and RAID arrays are running properly.
7. Handle with care: When handling hard drives, be sure to do so with care. Avoid dropping or jostling them, as this could damage the internal components.

Tips for Repairing Hard Drives and RAID Arrays
1. Back Up Your Data: Before attempting any repairs to a hard drive or RAID array, it is essential to back up any data that is still accessible. This will ensure that if any of the repair attempts fail, the data will not be lost.
2. Check for Physical Damage: If a hard drive or RAID array is not functioning correctly, it is important to check for any physical damage that may be present. This could include loose connections, broken components, or bad cables.
3. Check for Logical Errors: If there are no physical issues present, it is important to check for any logical errors or corrupt data that may be present on the drive. This can be done using various disk utilities, depending on the operating system in use.
4. Run Disk Repair Utilities: If logical errors are detected, it is important to run disk repair utilities to try and repair any corrupt data or other logical errors that may be present.
5. Rebuild the RAID Array: If the RAID array is still not functioning correctly, it may be necessary to rebuild the array. This will involve wiping the array and rebuilding it from scratch.
6. Replace the Hard Drives: If all else fails, it may be necessary to replace the faulty hard drives. This should be done one drive at a time, and the RAID array should be rebuilt each time a new drive is installed.
Common Solutions for Hard Drive and RAID Array Issues
1. Test for physical damage: If a hard drive or RAID array is not functioning correctly, the first place to start is to test for physical damage. Inspect the enclosure for any signs of damage such as dents, bends, or bulges. Check the drive’s connectors and internal components for any issues.
2. Check the power connection: If the hard drive or RAID array is not receiving power, it will not function correctly. Make sure that all cables are securely plugged in and that the power supply is functioning properly.
3. Check the data connection: Make sure that the hard drive or RAID array is connected to the correct input ports on the motherboard or RAID controller. Also, make sure that the data cables are securely connected and that all cables are functioning properly.
4. Check the RAID configuration: If the hard drive or RAID array is configured as part of a RAID array, ensure that the RAID is configured correctly. Make sure all drives are connected to the correct ports and the RAID array is set up correctly according to the manufacturer’s instructions.
5. Run a diagnostic test: If all of the above steps have been completed and the issue is still not resolved, then it may be time to run a diagnostic test. There are a variety of diagnostic tools available, such as HD Tune Pro and SeaTools. These tools can help to identify any issues with the hard drive or RAID array.
6. Reformat the drive: If all else fails, reformatting the drive may be necessary. Make sure to back up any important data before reformatting the drive. After the drive has been reformatted, it should be ready to use again.
Final Thought!
Troubleshooting hard drives and RAID arrays is an important task for any computer user. It is essential to have a good understanding of the different components that make up a hard drive or RAID array and how they work together. Knowing how to troubleshoot these components can help you identify and resolve issues quickly to keep your computer running smoothly. It is also important to have a backup plan in place so that you can restore your data in the event of a catastrophic failure.
